Volley Hub Pro

+
TEAM A
0
−
Match
−
0
TEAM B
+
👤 Guest ▾
🔑 LOG IN
Coach
TEAM A
TEAM B
TEAM A Setter Zone: ?
TEAM B Setter Zone: ?
Product Tutorials & Volleyball Guides

Volley Hub Pro Tactical Playbook

Volley Hub Pro is a free volleyball team generator, 3D lineup builder, roster manager and tournament bracket tool. The tutorials below explain team balancing, court rotations and match planning with worked examples.

Interactive Tool Tutorials & Feature Walkthroughs

Step-by-step guides explaining how to configure rosters, calculate balanced match-ups, and visualize complex rotational rules.

STEP 01 • ROSTER MANAGEMENT

Managing the Roster & Player Skill Ratings

Accurate team balancing begins with realistic player evaluation. Volley Hub Pro allows coaches and organizers to manage comprehensive player pools with granular 1-to-5 star rating metrics. A rating of 1.0 reflects beginner fundamentals (developing basic platform passing and underhand serving), 3.0 signifies intermediate competence (consistent overhead setting, jump float serving, and controlled cross-court attacks), while 5.0 designates varsity or club mastery (explosive approach mechanics, aggressive read blocking, and high-percentage side-out conversion).

In addition to overall weights, assign specialized volleyball positions: Setter (S), Outside Hitter (OH), Middle Blocker (MB), Opposite Hitter (OPP), and Libero (L). These labels help you inspect the generated teams. Role distribution must be checked and adjusted manually.

  • Granular Calibration: 1-5 star ratings with sub-decimal sensitivity for precise player tiers.
  • Positional Specialization: Color-coded badges for Setters, Hitters, Blockers, and Liberos.
  • Dynamic Pool Toggling: Quickly check/uncheck players arriving late or sitting out drills.
  • Drag-and-Drop Bench: Move reserves seamlessly between the court floor and sidelines.
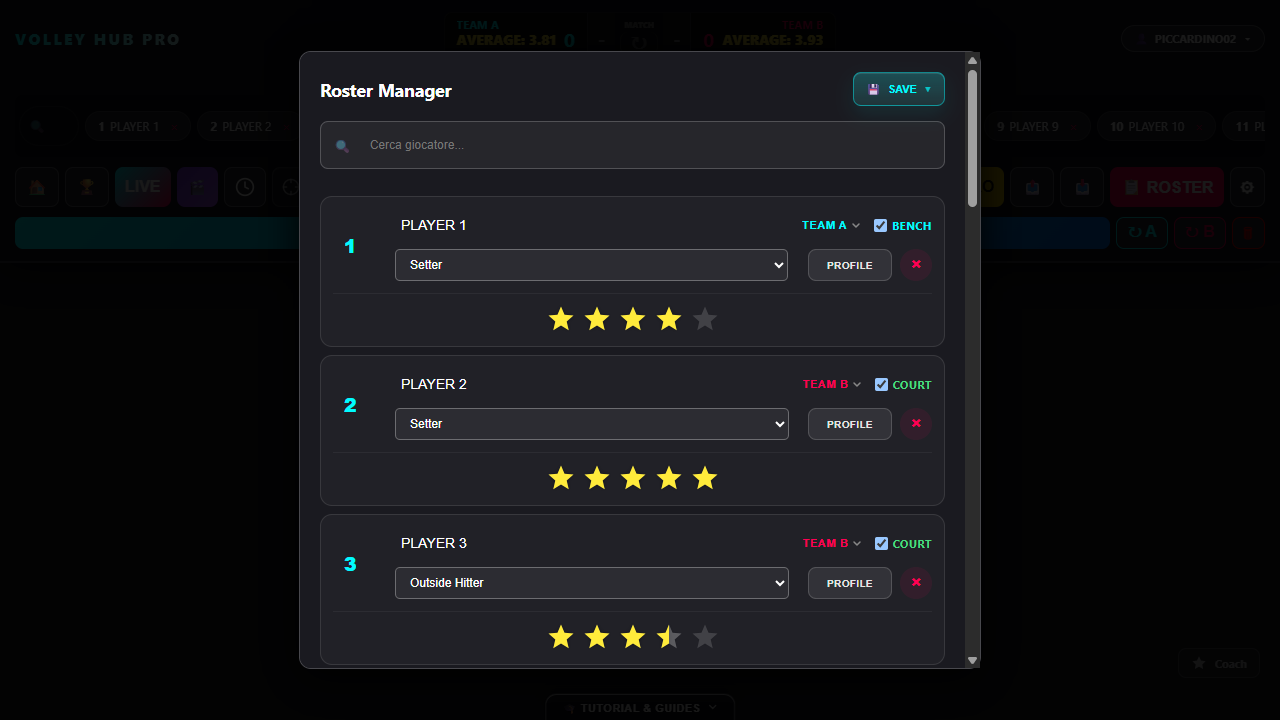
Volley Hub Pro roster management interface displaying player skill calibration and position assignment
STEP 02 • ALGORITHMIC BALANCING

Smart Balanced Team Generation Engine

Traditional random team generators often create frustratingly lopsided matches where all experienced athletes end up on one side. Volley Hub Pro solves this with an integrated 100-iteration Monte Carlo optimization algorithm. Upon clicking "Generate Teams", the engine tries up to 100 candidate squad splits and compares their average ratings. It can stop early when the averages match.

The selected candidate has the smallest average-rating gap among those tried. Player counts are equal for an even pool and differ by one for an odd pool. Check roles and playing time separately; equal ratings do not guarantee an equally strong match.

  • Up to 100 Candidates: Keeps the closest average-rating match among the splits tried.
  • Role Check: Inspect setter and libero labels, then adjust teams manually when needed.
  • Player Counts: Splits even pools equally; odd pools leave one extra player on a team.
  • One-Touch Re-Roll: Re-generate lineups with subtle stochastic noise for fresh practice variations.
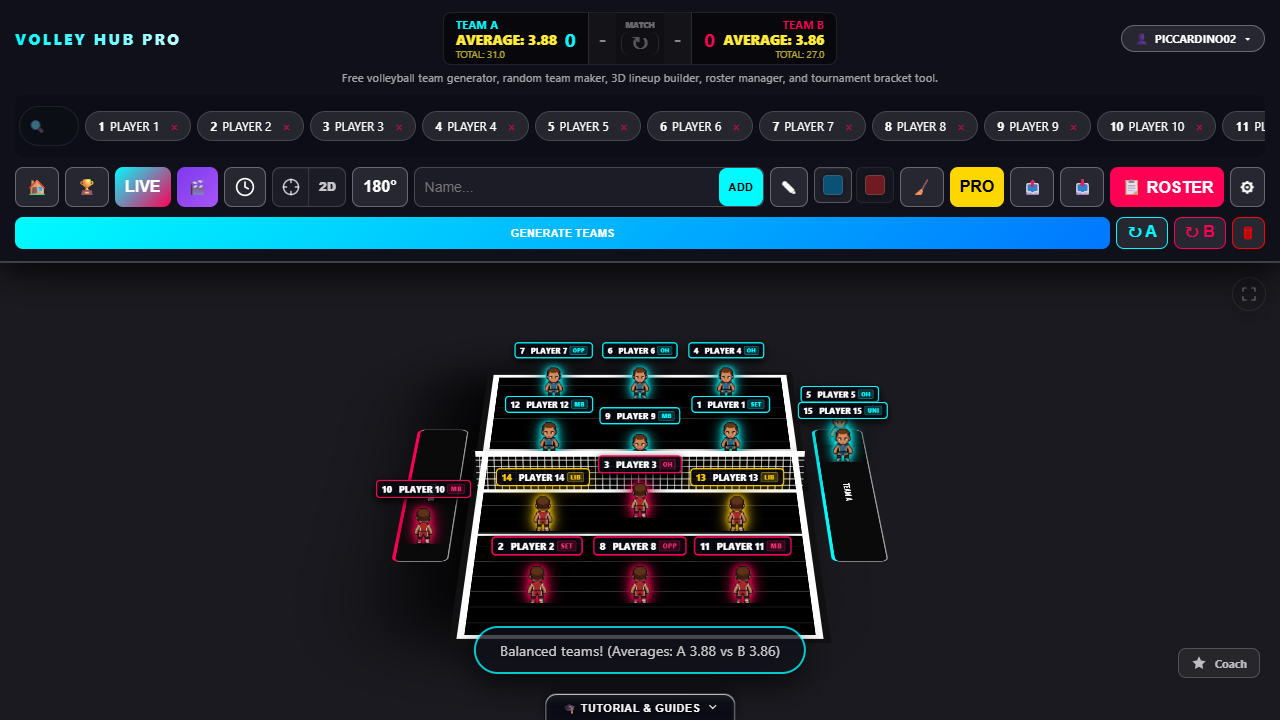
Volley Hub Pro balanced team generator distributing player ratings evenly across Team A and Team B
STEP 03 • 3D COURT & ROTATIONS

3D Court Visualization & Rotation Planning

Transition from basic team selection to advanced tactical execution. The 3D interactive court maps international FIVB court dimensions (18m x 9m) with 3m attack lines and precise zone markers (Zones 1 through 6). Coaches can switch instantly between the 2D Top-Down Tactical Whiteboard (ideal for tactical drawing, freehand movement arrows, and perimeter defense planning) and the 3D Isometric View (for spatial perspective and jump-serve angles).

Use the rotation controls to cycle through rotations R1 through R6 in clockwise order. In "Serious Mode", toggle between Step 1 (Legal Stack) to discuss pre-serve positioning alongside your competition rules and Step 2 (Penetrate) to illustrate setter penetration lanes and hitter switching paths before transition defense.

  • FIVB Rotation Sequencing: Instant cycling through Zones 1-6 with designated setter tracking.
  • Dual View Modes: Toggle between 2D tactical whiteboard and 3D spatial orbit.
  • Perspective Flip (180°): View plays directly from Team A or Team B dugout perspective.
  • Two-Phase Tactical Stepping: Visual demonstration of pre-serve legal stack vs post-serve offensive release.
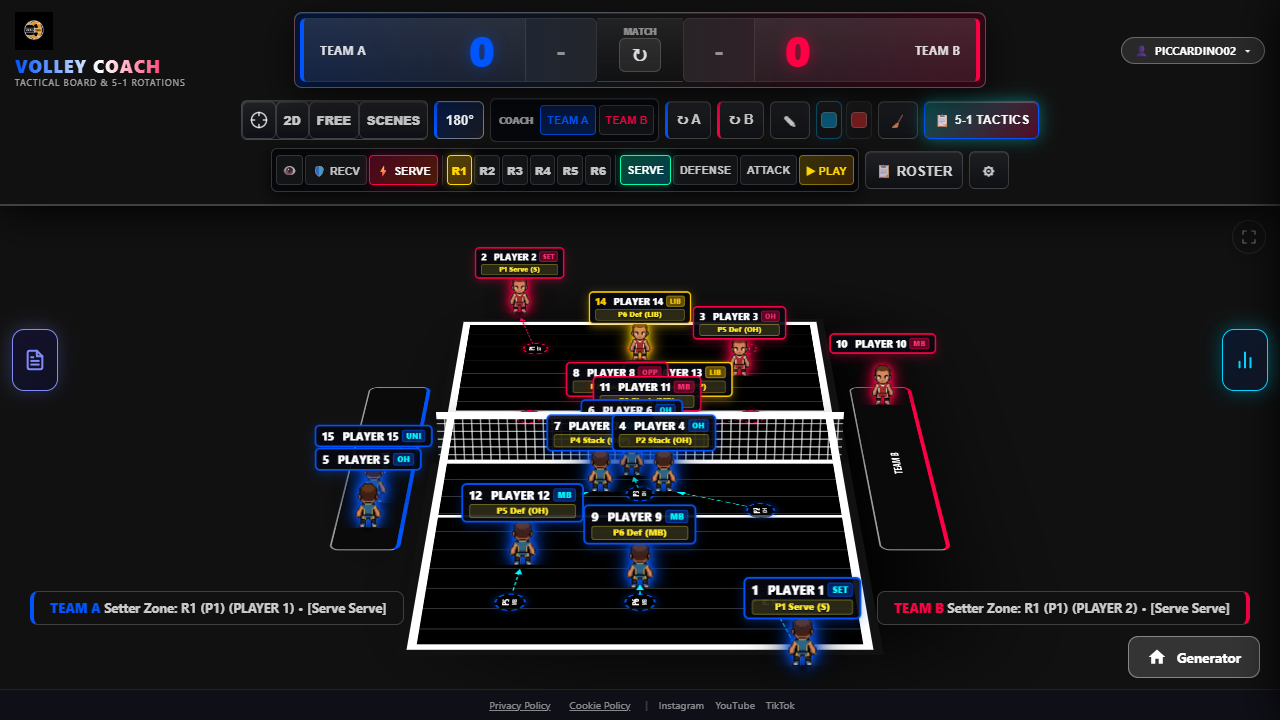
3D volleyball court rotation planner illustrating zone positions and legal stacking formations
STEP 04 • MATCH ENGINE

Live Score Tracking, Timeouts & Tournament Management

Volley Hub Pro extends beyond lineup generation to serve as an end-to-end match coordinator. The top scoreboard provides quick-touch point increment and decrement controls, side-out tracking, and team name customization. Manage official 30-second timeouts (2 per set per team) with instant counter resets, ensuring coaches adhere to tournament regulations.

For extended competitions, seamlessly navigate to the dedicated Tournament Bracket Maker (supporting single-elimination, double-elimination, and round-robin pools) or launch Live Match Mode for high-contrast scoreboard broadcasting and detailed match stat logging.

  • Side-Out Scoreboard: Real-time point tracking with one-touch correction and point undo.
  • Official Timeout Tallies: Track timeouts taken per set with automatic visual warnings.
  • Bracket Integration: Seamlessly port generated teams into single-elimination tournament trees.
  • High-Contrast Display: Optimized readability for outdoor sand courts, indoor gymnasiums, and projector screens.
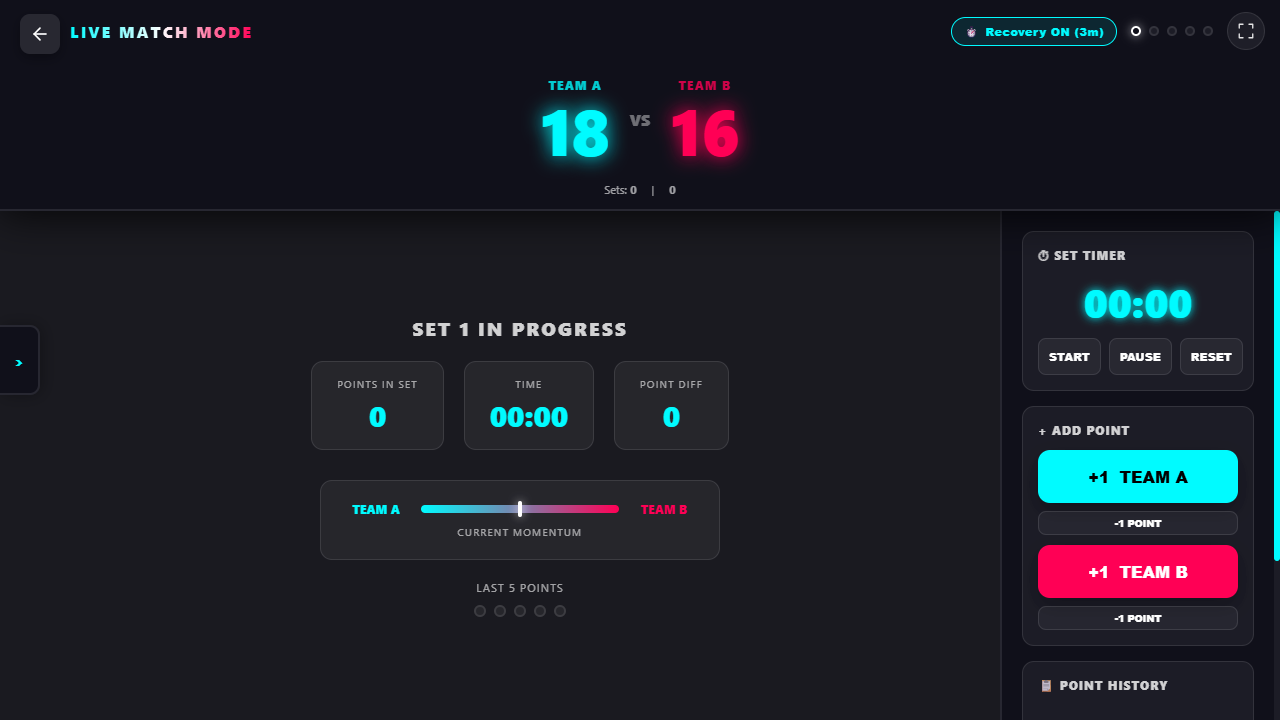
Live match scoring, set counters and tournament management interface in Volley Hub Pro

Volleyball Coaching & Strategy Library

In-depth technical guides, drill templates, tactical systems, and conditioning protocols written for coaches and athletes.

Using Volley Hub Pro

From Twelve Players to a Match Plan

Follow a worked example with twelve sample players, checked team averages, role adjustments and a four-team tournament schedule.

Read the worked tutorial →
Team Building

How to Create Balanced Volleyball Teams

Practical methodologies for dividing players into fair squads. Explore the snake draft, tiered pairing method, and skill-metric balancing for productive practices.

Read full guide →
Rules & Technique

Volleyball Rotation Rules Explained

Complete breakdown of court positions (Zones 1-6), rotational overlap faults, libero exchange rules, and offensive systems (5-1, 4-2, 6-2).

Read full guide →
Tactics & Systems

Advanced Offensive Systems: 5-1 vs 6-2

Understanding attack tempos (first, second, third), slide routes, pipe sets, combination plays, and designing an effective match play sheet.

Read full guide →
Tactics & Systems

Block & Defense Systems

Read blocking vs commit blocking, perimeter and rotational defenses, middle-up positioning, and converting digs into explosive counter-attacks.

Read full guide →
Technical Skills

The Setter's Handbook

Mastering hand shape, window technique, footwork mechanics, reading the opposing block, distributing to hot hitters, and court leadership.

Read full guide →
Rules & Technique

Mastering Serve Reception

Platform biomechanics, angle and tilt control, footwork patterns (shuffle, cross-over, drop step), reading server tendencies, and passing accuracy.

Read full guide →
Technical Skills

Mastering the Volleyball Attack

The four-step hitting approach, penultimate step mechanics, arm swing acceleration, wrist snap, cut shots, tooling the block, and error management.

Read full guide →
Technical Skills

The Ultimate Guide to Serving

Mechanics for standing float, jump float, and jump spin serves. Toss consistency, contact point, zone targeting, and tactical serve selection.

Read full guide →
Rules & Technique

The Libero's Playbook

Substitution regulations, setting restrictions in front of the 3m line, defensive floor coverage, second-ball setting, and organizing the back row.

Read full guide →
Training & Drills

How to Prepare an Effective Practice

Structuring training sessions: dynamic warm-ups, individual skill progressions, 6v6 game-like drills, tactical simulations, and cool-down protocols.

Read full guide →
Training & Drills

Warm-Up and Cool-Down Routines

Neuromuscular activation, dynamic mobility, shoulder and rotator cuff warm-ups, plyometric priming, and post-practice recovery methods.

Read full guide →
Event Organization

How to Organize a Volleyball Tournament

Complete tournament director guide: choosing bracket formats (single, double, round-robin), court scheduling, referee logistics, and tie-breakers.

Read full guide →
Data Analysis

Key Volleyball Statistics for Coaches

Measuring kill percentage, hitting efficiency, passing ratings (0-3 scale), side-out efficiency, point scoring runs, and using data to guide practices.

Read full guide →
Health & Conditioning

Volleyball Conditioning & Injury Prevention

Protocols for mitigating jumper's knee (patellar tendinopathy), ankle sprain prevention, rotator cuff stability, and vertical jump training programs.

Read full guide →
Health & Conditioning

Mental Toughness in Volleyball

Developing pre-point routines, refocusing after unforced errors, communication protocols, performing under clutch pressure, and team cohesion.

Read full guide →
Rules & Technique

Volleyball Rules and Refereeing

Official FIVB rule interpretations: rally scoring, double contact vs lift judgments, net touch violations, centerline penetration, and whistle mechanics.

Read full guide →

Strategy Library — Read the Full Guides Here

Every article of the coaching library is reproduced below in full. Open one from the list above (or from the list here): it expands in place, right on this page, with no other page to load.

Using Volley Hub Pro Open article

From Twelve Players to a Match Plan

A worked example of team ratings, role checks, court rotations and a small tournament schedule.

1. Start with the sample roster

Open the team generator. A guest browser with no saved roster starts with twelve fictional players. If you already have a roster, export it before making changes; you do not need to erase your work to follow the calculations below. Open Roster to inspect a player, then use the player detail panel to check the name, role and rating.

A rating is a planning estimate on the app's 1–5 scale, not a measured performance score. Use a consistent standard across the whole group. For a mixed practice, rate the players for the activity you intend to run, rather than comparing a specialist's best skill with another player's weakest one.

The app's twelve sample players and one manually checked split
PlayerRoleRatingExample team
RossiSetter4.2A
BianchiOutside hitter4.0A
VerdiMiddle blocker3.8A
RussoOpposite4.5B
FerrariOutside hitter3.6A
EspositoLibero3.9B
ColomboSetter4.1B
RomanoOutside hitter3.7B
RicciMiddle blocker4.0B
MarinoOpposite4.3A
GrecoOutside hitter3.5B
ContiLibero3.8A

The example includes liberos in the rating comparison. It is a team-building exercise, not an official starting lineup: for a regulation match, decide the starting six and libero replacements separately.

2. Generate, then check the numbers

Press Generate Teams. The app tries up to 100 candidate splits and keeps the one with the smallest gap between average ratings. It stops early if it finds an exact numerical balance. Because the candidates are shuffled, repeated presses can give different names on each side. The table above shows a valid split you can check yourself; it is not a promise that every press returns that split.

Team A: 4.2 + 4.0 + 3.8 + 3.6 + 4.3 + 3.8 = 23.7. Average: 23.7 ÷ 6 = 3.95.

Team B: 4.5 + 3.9 + 4.1 + 3.7 + 4.0 + 3.5 = 23.7. Average: 23.7 ÷ 6 = 3.95.

Read AVE and TOT beside each team name to compare average and total. A total alone can mislead you if there are different numbers of players. With an odd player count, one team has one extra player; consider how you will share playing time instead of treating the extra person as an automatic advantage.

3. Check roles before accepting the split

The generator balances ratings and player counts. It does not enforce one setter per team or a particular formation. In our manually checked example, each team has one setter, one middle blocker, one opposite, two outside hitters and one libero. Check your generated teams separately: two setters may end up together even when both averages are equal.

If a role is missing, drag players between teams and inspect the averages again. Prefer a playable team over a tiny rating difference. A useful practice check is: who sets the second ball, who covers reception, and who takes over when someone leaves the court? Decide those responsibilities before the first rally.

Volley Hub Pro's team generator with player tokens on the court
Use the court to inspect the generated groups. This interface illustration does not prescribe the split in the table.

4. Separate rotation order from tactical movement

Use Rotate A and Rotate B to advance the displayed court positions. Switch to Top View to explain court zones, or use Draw to mark a movement. Clear removes the drawing; it is different from resetting the roster. Use the Coach button for the dedicated tactical view.

A rotation sequence and a defensive base position answer different questions. First explain who follows whom in the service order. Then explain where each player moves for the drill. The visualizer is a planning aid and does not certify a legal lineup or referee positional faults. Check the rules used by your competition in the rotation guide.

5. Make a four-team event practical

Open Tournament Manager, create or select a tournament and choose four teams for an elimination bracket. Team preparation in the bracket is separate from the individual player list in the generator. For a single-elimination example, call the teams North, South, East and West; leave double elimination off if you want two semifinals and one final.

In the calendar, set a court, start time and duration for each scheduled match. For one court, this is a workable planning example:

One-court example for October 10, 2026, in your device's local time
MatchStartDurationCourt
Semifinal 118:0045 minutesCourt 1
Semifinal 219:0045 minutesCourt 1
Final20:0045 minutesCourt 1

Each slot leaves fifteen minutes before the next start. That buffer is your planning choice, not an automatic extension: a long match may still delay the final. You can schedule the final before its participants are known. The app warns about overlapping scheduled matches, but it cannot predict actual match length.

The date field accepts a pasted value such as 10/10/2026 18:00. Wait for valid date, time and duration fields to save. Export .ics for a calendar app or .pdf for a printout. Exports follow the active filters and include scheduled matches, so clear filters first if you want the whole schedule.

6. Save work before leaving the gym

As a guest, data belongs to the browser on this device. Export a roster or tournament backup before clearing storage or switching devices. A tournament JSON backup preserves the tournament data; a PDF or calendar file is for viewing the schedule and is not an editable backup.

When signed in, check synchronization feedback before relying on another device. If synchronization is pending, keep the local browser data and use the available retry action. When sharing screenshots or exported schedules, use only the player details that participants have agreed to share.

When the result looks wrong

  • Missing player: check that the player is active in the roster.
  • Equal averages, awkward teams: inspect roles and adjust the split manually.
  • Missing match in an export: check the date/time and calendar filters.
  • Blank roster on another device: check whether the original work was saved as a guest.

Report reproducible issues or corrections through Contact and corrections, with the page name and steps you followed.

Team Building Open article

How to Create Balanced Volleyball Teams

Practical methods for dividing players into balanced teams for fair matches and productive training sessions.

Why Balance Matters

A volleyball match becomes boring when one team dominates the other. Weaker players get discouraged, while stronger ones are not challenged to give their best. Creating balanced teams is not just about fairness: it is the best way to help all participants improve, keep motivation high, and ensure longer and more exciting rallies. Whether you are a coach, a PE teacher, or simply a group of friends organizing a tournament, knowing how to balance teams is a fundamental skill.

Key Criteria for Evaluating Players

Before splitting teams, you need to establish objective evaluation criteria. Here are the most commonly used parameters by volleyball coaches at all levels.

1. Overall Technical Rating

Assign each player an overall score from 1 to 5 (or 1 to 10). This value should reflect the player's general level considering bumping, setting, serving, spiking, and blocking. An absolute beginner gets 1, an intermediate player gets 3, an experienced athlete gets 5. In digital tools like Volley Hub Pro, this rating is displayed with stars for quick readability.

2. Specific Role

In volleyball, each role has different skills. A setter is not interchangeable with a spiker. When balancing teams, make sure each team has at least one setter and a balanced distribution among hitters, middle blockers, and liberos. There is no point in having a team with three setters and the other with none.

3. Detailed Statistics

For more precise balancing, evaluate players across multiple dimensions: attack, serve, block, setting, and defense. A player may be very strong in attack but weak in defense; another may be an outstanding blocker but have an inconsistent serve. Adding up these ratings gives you a much more accurate picture of each athlete's real value.

Practical Balancing Methods

The Snake Draft Method

This is probably the most used and most effective method. Rank players from strongest to weakest. Then assign them in turn: the first goes to Team A, the second to Team B, the third to Team B (reversal), the fourth to Team A, and so on. This way the sum of the two teams' ratings ends up almost identical. It is fast and works well with groups of 8 to 20 players.

Practical example: Players rated: Marco(5), Luca(4.5), Andrea(4), Paolo(3.5), Giovanni(3), Stefano(2.5), Francesco(2), Elena(1.5). Following the A-B-B-A snake order, Team A is Marco(5), Paolo(3.5), Giovanni(3), Elena(1.5) = 13. Team B is Luca(4.5), Andrea(4), Stefano(2.5), Francesco(2) = 13. Each average is 13 / 4 = 3.25. Check roles separately before accepting the split.

The Pair Method

Identify the two strongest players and place them on opposite teams. Then take the next two and assign them the same way. Continue until all players are assigned. This method works especially well when you have 2-3 very dominant players who would tip the balance too much.

Computerized Balancing

Volley Hub Pro compares up to 100 candidate splits using your overall player ratings and keeps the smallest difference between team averages. It balances player counts but does not enforce role distribution or guarantee the global optimum. Check setters, receivers and substitutes yourself. The worked product tutorial shows twelve sample players and a split you can verify by hand.

Common Mistakes to Avoid

  • Relying only on intuition: Without numerical evaluation, we tend to underestimate or overestimate players based on likability or the last memorable play.
  • Ignoring roles: Two teams with the same average rating but different role composition will play very differently. A team without a setter is destined to struggle.
  • Forgetting athletic aspects: Height, jumping ability, and speed matter. A short player with great technique can still be at a disadvantage at the net against taller opponents.
  • Not updating ratings: Players improve over time. Ratings should be reviewed periodically, especially in groups that train regularly.

Adapting Teams to Context

There is no one-size-fits-all method. For a casual tournament among friends, you might want teams as balanced as possible. For a training session where you want to test a new offensive scheme, you might deliberately create a stronger team to challenge your starters. In youth settings, it is often useful to mix experienced players with beginners to encourage on-court learning. The important thing is to have a clear goal before you start.

Useful Tools

Besides Volley Hub Pro, there are other tools that can help: spreadsheets with custom formulas, automatic draft apps, and even simple name cards to draw from. Technology does not replace the coach's experience, but it can save a lot of time and reduce evaluation errors.

With Volley Hub Pro you can create your teams in a few clicks. Assign star ratings, specify roles, and compare the suggested split, then adjust roles for your match. Try the free generator →
Rules & Technique Open article

Volleyball Rotation Rules

Positions, rotation faults, and tactical schemes: the complete guide to understanding how volleyball rotations work.

Rule edition and competition: This guide refers to the FIVB 2025–2028 rulebook. Selected 2026 competitions trial different reception timing and substitution limits; see the FIVB trial announcement and confirm your organizer's rules. Updated October 9, 2026.

Why Rotations Exist

Volleyball is unique in that players cannot stay in a fixed position for the entire match. Rotations were introduced to ensure that every player participates in both attack and defense, and to prevent a specialized athlete from monopolizing one area of the court. Understanding rotations is essential for any coach, player, or enthusiast who wants to go beyond superficial knowledge of the game.

The Starting Positions: 6 Court Zones

The volleyball court is divided into 6 zones, numbered 1 through 6. At the moment of service, players must occupy specific positions based on these zones. Here is the standard layout:

  • Zone 1: Right back (serving position). The player serving.
  • Zone 2: Right front. Typically occupied by the opposite hitter or the setter in some rotations.
  • Zone 3: Center front. The middle blocker's position, specialized in blocking and quick attacks.
  • Zone 4: Left front. The outside hitter's position.
  • Zone 5: Left back. Often a receiver or libero.
  • Zone 6: Center back. Another reception and defense position.

How Rotation Works

When the receiving team wins the rally and earns the right to serve, all its players rotate one position clockwise. The player in zone 2 moves to zone 1 (to serve), the player in zone 1 goes to zone 6, and so on. Rotation only happens when the receiving team wins the point. If the serving team wins the point, there is no rotation and the same player continues serving.

FIVB 2025–2028: At service contact, receiving players must respect relative positions; serving players have free positioning. Service order still applies to both teams. See Rules 7.4–7.7.

Positional Fault and Wrong Server

A positional fault concerns player alignment; a rotational fault concerns the wrong player serving. They are different checks. In the base 2025–2028 rules, reception alignment is assessed at service contact.

Special Role: The Libero

The libero replaces back-row players without an ordinary substitution. Under FIVB rules, the libero cannot serve, block or attempt to block, or finish an attack with the ball entirely above net height. The replaced player returns before that place reaches the front row.

Common Rotation Systems

5-1 (One Setter)

One setter runs the offense in all six rotations. With the setter in front, there are two other front-row players available to hit; with the setter in back, there are three. Back-row attacking options depend on the lineup and the applicable attack restrictions.

4-2 (Two Setters)

Two setters are opposite in the rotation. The front-row setter usually sets, leaving two other front-row hitters. Setting is a tactical responsibility, not a rule that prohibits that setter from attacking a legal ball.

6-2 (Two Setters with 6 Attackers)

An advanced variant of the 4-2 system. The two setters always play in the back row, while the front row always has three attackers. Requires athletic setters capable of also defending. It is a very offensive system but complex to manage in rotations.

Tips for Coaches

  • Teach rotations gradually: first without the ball, then with slow movements, then in game situations.
  • Use visual tools like Volley Hub Pro's 3D court to show players where they need to position themselves.
  • Practice specifically on transitions between the rotation phase (ordered position) and the play phase (free movement).
  • Record matches and analyze rotation errors together with your players.
  • For beginners, start with the 4-2 system, which is simpler to understand and manage.
The 3D formation generator in Volley Hub Pro lets you visualize rotations in real time on the court. Position players, rotate the view, and check positions before the match. Try the 3D viewer →
Tactics & Systems Open article

Advanced Offensive Systems

Maximizing attacking efficiency: offensive tempo, combination plays (pipe, slide), running 5-1 and 6-2 systems, and tactical play calls.

Introduction to Offensive Tactics

In competitive volleyball, simply hitting a high set over the net is not enough. Opposing blockers are tall, fast, and coordinated, and they will easily block or dig slow, predictable attacks. To score consistently, a team must develop a complex offensive system that manipulates space, shifts blocker attention, and creates timing mismatches. An advanced offense coordinates the speed (tempo) of the set, the positioning of the hitters, and the movement of back-row attackers to break down the opponent's defensive block.

Offensive Tempos: Controlling the Clock

The speed of the set relative to the hitter's approach is called tempo. Varying tempo is the easiest way to catch blockers out of position. There are three primary tempos in modern volleyball:

First Tempo (Quick Attack)

First tempo sets are low and fast, designed to be hit by the middle blocker. In a first-tempo play (such as a "one" or "quick"), the hitter begins their approach and jumps before or exactly as the ball leaves the setter's hands. The setter simply pushes the ball a few inches above the net, and the hitter strikes it immediately. This play leaves the opponent's middle blocker with no time to read, forcing them to jump in anticipation. If the block does not react instantly, the hitter scores easily; if the block does react, it opens up space for the wing attackers.

Second Tempo (Shoot or Gap)

Second tempo sets are flatter and faster than high sets, directed to the outside or opposite hitters. For example, a "shoot" is a fast, horizontal set to the left-side antenna (position 4). The hitter starts their approach as the ball travels through the air. Second-tempo sets are designed to beat the opponent's middle blocker before they can slide laterally to assist the outside blocker, creating a one-on-one hitting scenario.

Third Tempo (High Ball)

Third tempo is the classic, high-arc set. It is used when the first pass is poor or out of system, forcing the setter to push the ball high to the pin. The hitter waits until the ball reaches its peak before starting their full approach. Third-tempo sets give the blocker time to set up a double or triple block, requiring the hitter to use smart tools, wipes, or tips rather than pure power.

Combination Plays: Creating Decoys

Combination plays require two or more hitters to run intersecting approach paths to confuse the opponent's block. The most common combination plays are:

The Slide Attack

The slide is a first-tempo attack run by the middle blocker behind the setter. The hitter runs laterally behind the setter and jumps off one foot, catching the ball on the run. The horizontal momentum makes it incredibly difficult for the opposing blockers to track the hitter. It is a staple offensive play in women's volleyball.

The Pipe Attack

The pipe is a back-row attack run from position 6 (middle-back). While the middle blocker runs a first-tempo decoy in the front row, the back-row outside hitter jumps from behind the ten-foot line, hitting a fast second-tempo set. The blocker jumping with the middle blocker is caught on the way down, leaving the pipe hitter with a clear view of the court.

The Tandem or "X" Play

In an "X" play, the middle blocker runs a quick decoy in front of the setter, and the outside hitter crosses behind them to hit a second-tempo set. The goal is to draw the opposing middle blocker to jump with the decoy, leaving the crossing hitter with a single-block or no-block attack option.

Formations: Choosing Your System

A team's overall system determines how many setters and hitters are on the court. The two most common competitive systems are:

The 5-1 System

The 5-1 system uses one setter and five hitters. The setter remains on the court in all six rotations. When the setter is in the back row, there are three front-row hitters available, allowing for maximum offensive options. When the setter is in the front row, there are only two front-row hitters, but the setter can attack the second ball (setter dump). The 5-1 system provides high tactical consistency because hitters only have to adapt to one setter's rhythm.

The 6-2 System

The 6-2 system uses two setters and six hitters. The setter in the back row runs the offense, while the setter in the front row acts as a hitter (opposite). This system guarantees that there are always three front-row hitters available in all six rotations, maximizing the team's net height and blocking power. However, it requires having two highly talented setters and requires the hitters to constantly adjust to different setting styles.

Developing the Play Sheet

To run these systems, teams must establish clear hand signals and terminology. Before the serve, the setter hides their hand behind their back and shows a number to the front-row hitters (e.g., 1 for a quick, 2 for a back-set, 5 for a slide). This allows the hitters to prepare their approach paths and ensures the setter knows exactly where their options will be. Practicing these sequences in scrimmage situations builds the coordination needed to run an unstoppable, high-efficiency offense.

Use Volley Hub Pro's 3D lineup builder to plot hitter approach lines, coordinate combination plays, and design custom offensive playbooks. Design your playbook now →
Tactics & Systems Open article

Volleyball Block and Defense Systems

Building cohesive defensive schemes: read vs. commit blocking, perimeter/rotation defenses, and transition play.

Coordinating Block and Defense

In high-level volleyball, block and back-row defense must act as a single, coordinated system. A block cannot protect the entire court, and defenders cannot dig every hit. Therefore, the block's job is to take away specific zones of the court, while the defenders line up in the "shadow" of the block to cover the remaining areas. Without coordination, blockers and defenders will step in each other's way, leaving gaping holes for the opponent's attackers to exploit.

Blocking Strategies

The front-row blockers are the first line of defense. The team's defensive system depends on how the blockers read and react to the setter. There are three primary blocking systems:

1. Read Blocking

In a read blocking system, the blockers do not jump until they see where the ball is set. The middle blocker stands in the center and tracks the ball out of the setter's hands, then moves laterally to assist the outside or opposite blocker. Read blocking is highly effective against high sets and teams with predictable distribution. It minimizes errors and prevents blockers from jumping on fake attacks (decoy plays), but it can be too slow against extremely fast, low-tempo sets.

2. Commit Blocking

Commit blocking requires a blocker (usually the middle blocker) to jump with a specific hitter, regardless of where the ball is set. This is used when the opponent has an elite middle hitter running fast quick attacks. The middle blocker commits to jumping to shut down the quick, leaving the outside blockers to handle sets to the pins alone. While it stops the quick attack, it exposes the team if the setter distributes the ball elsewhere.

3. Option Blocking

Option blocking is a hybrid system where blockers prioritize one hitter based on scouted tendencies or the quality of the pass. For example, if the pass is perfect, the middle might commit-block the quick; if the pass is off the net, all blockers switch to read-blocking the pin hitters. Option blocking requires high intelligence and quick decision-making from the front-row players.

Back-Row Defensive Systems

Once the block is set, the three back-row players must position themselves to catch any ball that gets past the net. The three most common systems are:

1. Perimeter Defense

Perimeter defense is the most common system in modern volleyball. Back-row defenders stand close to the boundaries (sidelines and endline), leaving the middle of the court open. The block takes away the hard-angle hits, while the defenders are in position to dig hard-driven deep attacks. Players must read the attacker's shoulder: if the shoulder drops, they step forward to cover a tip (short shot); if the shoulder remains high, they stay deep. This system requires excellent reaction time and agility.

2. Rotation Defense

In a rotation defense, when the ball is set to an outside hitter on the pin, the defender on the line rotates forward to cover the tip or short shot behind the block. The middle back defender shifts toward the line, and the off-blocker (the front-row player not involved in the block) drops back to cover the middle-court area. This rotation ensures that short tips are easily dug, but it requires fast, coordinated movement to avoid leaving the deep corners vulnerable.

3. Middle-Up Defense

Middle-up defense places the middle-back defender close to the ten-foot line to cover tips and short roll shots. The left-back and right-back defenders stay deep to cover hard-driven balls. This is a very common system in junior and recreational leagues where attackers tip frequently. However, it leaves a massive open space in the deep center of the court, which competitive hitters can exploit.

The Mechanics of Digging

Digging a hard-driven spike requires different posture than passing a serve. Since the ball travels much faster, the defender has less time to align their body. Here are key digging mechanics:

Low and Loaded Posture

Defenders must stand with their feet wider than shoulder-width, knees bent deeply, and weight on the balls of their feet. The chest should be forward, and hands should be out in front of the body, ready to separate or form a platform instantly. Being "low" allows the player to drop to the floor to salvage low balls.

Pursuit and Emergency Techniques

When the ball is out of reach, defenders must use emergency techniques like the roll or the pancake. A pancake involves sliding the hand flat along the floor, palm down, so the ball bounces off the back of the hand. The key to emergency defense is pursuit: never give up on a ball. A player's effort to chase down a deflected ball can inspire the entire team.

Transition Play: Turning Defense into Offense

A defensive dig is only successful if it leads to a counter-attack point. This process is called transition. As soon as the ball is dug, the team must switch from defensive positioning to offensive approach patterns. The setter must run to the net to set, and the hitters must sprint outside the court boundary to get a full approach. If the setter is forced to dig the first ball, the team must have a designated "secondary setter" (usually the libero or opposite) who steps in to set the ball to the remaining hitters. Transition efficiency is what separates championship teams from average ones.

Use Volley Hub Pro's 3D generator to simulate team transitions from defense to offense and save your preferred defensive rotation coordinates. Set up your defense now →
Technical Skills Open article

The Setter's Handbook

A masterclass in setting mechanics: hand placement, posture, court distribution, and quarterbacking the team.

The Setter: The Quarterback of Volleyball

The setter is the most complex and demanding role on the volleyball court. Often compared to a quarterback in football, the setter is responsible for running the offense, directing play calls, and deciding who gets the ball. Every set is a tactical choice that can open up the opponent's block or trap a hitter in a difficult situation. A setter must possess not only clean physical mechanics but also excellent strategic vision, quick decision-making, and strong emotional leadership.

Setting Mechanics: Creating the Window

Setting requires soft hands and precise control. The contact is brief, yet it must be clean to avoid a double-contact fault. The key is how the setter shapes their hands before the ball arrives:

Hand Shape and Window

The setter should raise their hands above their forehead, forming a shape that matches the contour of the ball. The thumbs and index fingers of both hands should form a diamond-shaped window. Looking through this window at the ball ensures the setting action happens directly above the hairline. The fingers should be spread wide and remain relaxed. The contact must occur on the pads of the fingers, never on the palms.

Quick and Equal Contact

When the ball enters the hands, the wrist and fingers act as springs. They absorb the ball's momentum for a split second and immediately push it back out. If the ball stays in the hands too long, it is a lift; if the hands contact the ball unevenly, it is a double contact. To avoid these errors, setters must practice using both hands with equal force. Using a heavy setting ball or medicine ball drills builds finger and wrist strength, leading to cleaner, more consistent set releases.

Footwork: The Right Foot Forward Rule

Clean hands are useless if the setter is off-balance. Good footwork is what allows setters to get under the ball and remain stable. The most important footwork guideline is the "right foot forward" rule:

Why Right Foot Forward?

When squaring up to set, the setter's right foot should always be slightly ahead of their left. This posture serves two critical functions:

  1. It prevents the setter's hips from turning toward the net, which would push the set over the net into the opponent's court (a common mistake).
  2. It keeps the ball on the receiving team's side of the net, allowing the hitters to make an approach without crossing the line.

Moving to Off-Target Passes

Passes are rarely perfect. A setter must constantly chase down passes that drift off the net. The movement pattern should always end with the setter planting their feet, squaring their shoulders to the left-side target (position 4), and executing the set from a balanced stance. If the pass is very tight to the net, the setter must jump to intercept the ball (jump setting), which also prevents the ball from crossing the net or hitting the mesh.

Game Distribution: Outsmarting the Block

A great setter does not set randomly. They analyze the opponent's defense and distribute the ball strategically to create the highest chance of scoring:

Reading the Opponent's Middle Blocker

Before the set, the setter should check the positioning of the opponent's blockers. If the opponent's middle blocker leans toward the outside hitter, the setter should set a quick middle or back-set the opposite. By keeping track of the middle blocker's movement, the setter can set the ball to the hitter who has a single block or no block at all.

Feeding the Hot Hitter

Every match has momentum shifts. If a hitter is on a "hot streak" and scoring repeatedly, the setter should continue to feed them until the opponent's defense adjusts. Conversely, if a hitter has made multiple consecutive errors, the setter should feed a different option to relieve pressure, allowing the struggling hitter to recover mentally before getting the ball again.

Exploiting Defensive Mismatches

Analyze size differences at the net. If the opponent has a short setter in position 4, set your opposite hitter (attacking from position 2) who will be hitting over a shorter block. Exploiting these mismatches is a reliable way to secure consistent side-out points.

Leadership and Communication

The setter is the emotional heart of the team. Because they touch the ball on almost every play, their attitude sets the tone for the entire squad. If the setter looks stressed or frustrated, the hitters will lose confidence. A setter must maintain a calm, positive presence. Between rallies, the setter should communicate with their hitters, confirming play calls, discussing blocker positions, and encouraging players who have missed a play. By quarterbacking the court with authority and positivity, the setter helps the team maintain focus under pressure.

With Volley Hub Pro, you can customize your starting rotations, define setter release patterns, and generate play sheets for your hitters. Set up your tactical offense now →
Rules & Technique Open article

Mastering Serve Reception

A comprehensive guide to underhand passing platform mechanics, movement, server reading, and tactical adjustments.

Introduction to Serve Reception

In volleyball, serve reception is the foundation of the entire offensive transition. It is the absolute first contact of a rally for the receiving team, and its quality determines the success rate of the subsequent set and attack. A perfect pass gives the setter the freedom to distribute the ball to any hitter, keeping the opposing blockers guessing. On the other hand, poor reception limits offensive options, allowing the opponent's block and defense to easily align. To master serve reception, players must combine physical mechanical discipline, lightning-fast footwork, analytical reading skills, and a resilient mindset.

The Mechanics of the Passing Platform

The underhand pass (often called the forearm pass or bump) relies on a stable and consistent passing platform. This platform is created by joining the hands and extending the arms to form a flat, wide surface for the ball to bounce off. The quality of this platform determines where the ball will go. Here are the core mechanical steps for building a perfect platform:

Hand and Arm Alignment

Players should place one hand inside the other, crossing their thumbs side-by-side. Never cross the fingers, as this reduces flexibility and increases injury risk upon high-speed impacts. The wrists must be flexed downward to hyper-extend the elbows, turning the inside of the forearms upward. This creates a flat, fleshy surface rather than a bony one. The arms must be locked straight, with no bend in the elbows. Bending the elbows during contact absorbs the ball's momentum inconsistently, causing uncontrolled passes.

Angle and Tilt

The platform is a steering wheel. To pass the ball forward and high toward the setter, the player must tilt the platform. If the ball is received on the right side of the body, the right shoulder must drop, tilting the platform back toward the center of the court. The angle of the platform relative to the incoming trajectory of the serve determines the launch angle. A player must face the ball but angle their platform toward the target, allowing the ball's incoming energy to rebound toward the setter's zone.

Quiet Arms and Body Leverage

A common mistake is swinging the arms to push the ball. Swinging the arms makes it difficult to control the speed and direction of the pass, especially against fast serves. Instead, the arms should remain relatively still. The power and height of the pass should come from the knees and hips. By using a gentle upward extension of the legs, the player transfers energy from the ground through the platform to the ball. The platform simply intercepts the ball and directs it.

Footwork Patterns: Getting Behind the Ball

Even the best platform is useless if a player cannot get in position to use it. Proper positioning requires the player to contact the ball in the midline of their body whenever possible. Moving efficiently to the ball involves three basic footwork patterns:

1. Shuffle Step

For short lateral adjustments (one or two steps away), the shuffle step is the most effective. The player pushes off the foot opposite to the direction of travel and slides the closer foot, keeping a low center of gravity. The feet should never cross. This keeps the chest facing the net and allows the player to quickly drop into a passing stance.

2. Cross-Over Step

When the serve is hit deep or far to the side, the shuffle step is too slow. The player must use a cross-over step. To move right, the player pivots on the right foot, crosses the left foot over the right, and then sprints to the spot. Before contacting the ball, the player must plant their feet and stabilize their core to create a solid foundation for the pass.

3. Drop Step

To handle deep serves that travel directly over the player's head, the drop step is required. The player drops one foot back at a 45-degree angle, pivots, and retreats diagonally. This allows the player to run backward while keeping their eyes on the ball, preventing them from being caught under the ball and forced to pass over their shoulder.

Reading the Server and Ball Trajectory

Anticipation is the secret weapon of great passers. Waiting until the ball crosses the net to react is too late. Passers must learn to read clues from the server before and during the serve:

The Server's Prep and Body Orientation

Look at the server's posture and alignment. A server's shoulders and hips usually point toward the zone they intend to target. If a server tosses the ball slightly forward and inside, they are likely serving short. If they toss the ball high and behind them, a deep float serve is incoming. Watching the server's arm swing speed also provides clues about ball velocity.

Evaluating Spin and Seam Alignment

A ball with no spin (a float serve) is highly unpredictable because air currents cause it to drop or drift suddenly. Passers must look at the valve or logo of the volleyball. If the logo is spinning rapidly, the ball will follow a stable, curved path (topspin). If the logo is static, the ball will float. Against float serves, the passer must keep their feet active until the very last millisecond, anticipating a sudden drop. Against topspin serves, the passer must drop their hips and prepare for a heavy, fast impact.

Mental Resilience and Court Communication

Serve receive is as much a mental challenge as a physical one. If a passer makes an error, the opposing server will immediately target them again. Passers must maintain high confidence and develop a short memory for mistakes. Communication is critical to avoid confusion between adjacent passers. The player calling "mine" or "me" must do so loudly and early, before the ball crosses the net. When receiving in seams (the boundary areas between two players), clear rules must be set beforehand, such as the left-side player taking responsibility or the deeper player taking the ball.
Using Volley Hub Pro, coaches can design custom serve-receive formations, designate seams, and coordinate coverages. Generate tactical lineups now →
Technical Skills Open article

Mastering the Volleyball Attack

From the four-step approach to the kill: hitting mechanics, wrist snap, sharp angles, tips and wipes, and smart error management.

The Four-Step Approach

The spike begins long before the ball is hit. A controlled, rhythmic approach converts horizontal speed into vertical power while keeping the hitter balanced under the set. The standard right-handed four-step approach is: right, left, right-left. The first two steps are "go" steps that cover ground; the final two are a quick "plant" that loads the legs and converts forward momentum into a high, explosive jump. Left-handed hitters mirror the pattern, starting with their left foot. The key is timing the final two steps so the last jump happens inches in front of where the ball will fall—never under it.

Arm Swing Mechanics

Once airborne, the arms move in a coordinated sequence known as the full-arm swing. As the body rises, the hitting shoulder draws back and the elbow lifts high, keeping the hand above the ball. The non-hitting arm stays raised toward the ball, helping the hitter track it and protecting the net. At the top of the swing, the hitting elbow leads forward, the shoulder rotates through, and the arm whips over the top of the ball with the wrist flexed and the palm open.

Hand Contact and the Whip

At the moment of impact, the hand should be open, relaxed, and on top of the ball. Contact happens across the center of the palm with the fingers spread wide, keeping the ball in front of the hitting shoulder. The wrist must snap through the ball, pulling from high back to low forward, exactly like a fast hand wave. This wrist break is what turns a hard-but-flat hit into a sharp, fast-descending spike that lands inside the court.

The Foot Plant and Rotation

Up to eighty percent of spike power comes from the legs and hips, not the shoulders. The hitter jumps with the body slightly turned away from the net, and the torso rotates forward as the ball is struck. The core untwist transfers force from the plant foot up through the hip and into the shoulders. Hitters who rely on the arm alone hit hard for a short time and tire quickly; the jump-rotate-whip sequence is what delivers power with endurance.

Hitting Zones and Shot Selection

A great hitter is not the one who hits the hardest, but the one who chooses the right shot for every approach. Reading the block before hitting decides whether to swing through the seam, tool the hands, or tip. Against a double block, the two openings are down the line and cross-court. Down-the-line hits follow the direction of the approach; cross-court hits are pulled across the opposing middle blocker's head. Aiming one to three meters inside the sideline reduces net errors dramatically.

Tips and Roll Shots

When the block is up and the timing is late, the smartest play is often not to swing at all. The push tip places the ball in the deep space behind the blockers, while the slow roll shot is dinked over the block into the open court. Both keep the pressure on the defense without risking a full swing into the block. In lower levels of play, the tip remains one of the most under-used scoring weapons on the court.

Common Hitting Mistakes

Most attack errors come from a few repeatable faults. An approach that finishes too deep forces the hitter to swing backward across the ball. A hand placed too far under the ball launches the spike into the net or out of bounds. Swinging with the elbow locked to the body kills the whip and produces a weak, defensible hit. Hitting straight at the block instead of around it hands free balls to the opponent. And after two or three consecutive errors, frustration often leads to an even harder swing at the block instead of a calm, technical shot.

Error Management and Consistency

Attack percentage is decided by the mistakes, not the highlights. The best hitters in the world aim not for spectacular kills but for a high kill efficiency: no out-of-system swings, no netted balls on easy sets, and a clear shot selected before the jump. After every missed attack, run the fault check: was the approach late, the contact under the ball, the wrist not flexed? Fixing the cause one swing at a time builds the consistency that raises the tempo of the entire offense and forces blockers to respect every approach.

Track attack efficiency and hitter stats, then turn the numbers into drills with Volley Hub Pro's practice and lineup tools. Plan a practice now →
Technical Skills Open article

The Ultimate Guide to Volleyball Serving

Mastering serving mechanics: from consistent tosses to standing float, jump float, jump spin, and tactical target strategies.

The Importance of Serving

In volleyball, serving is the only aspect of the game where the player has total, independent control over the ball. Unlike setting or attacking, serving is not dependent on a teammate's pass. It is the initial offensive strike of a play. A strong serve can score points directly (aces), disrupt the opponent's transition, or force a weak attack that your block can easily contain. Developing a consistent, aggressive serve is essential for any player who wants to win competitive matches.

Core Fundamentals: The Toss and Weight Transfer

Regardless of the serve type, two fundamental concepts determine its success: the toss and the transfer of body weight. Consistency in these areas builds reliability under pressure.

Toss Consistency

The toss is the most critical part of the serving sequence. A bad toss leads to a bad serve. For a standard standing serve, the toss should be straight, about two to three feet high, and slightly in front of the hitting shoulder. The server should toss the ball using their non-dominant hand with a straight elbow, pushing the ball upward without any spin. Spinning the ball during the toss makes it wobble and hard to contact cleanly. Practicing the toss without hitting the ball is an excellent way to build muscle memory.

Weight Transfer

To generate power, a server must transfer their weight from their back foot to their front foot. When starting, the server's weight should be on the rear leg. As the toss goes up, the server steps forward with the opposite foot, shifting their center of mass. This transfer adds body weight behind the strike, allowing the server to hit with high speed without straining their shoulder or arm muscles.

Types of Serves and Execution Mechanics

There are four main types of serves used in volleyball. Each serve has distinct mechanics and tactical advantages:

1. Underhand Serve

The underhand serve is the easiest to learn and control, making it perfect for beginners. The server holds the ball in their non-dominant hand in front of their body, steps forward with the opposite foot, swings their dominant arm back, and strikes the ball off the holding hand. The contact should be made with the heel of the hand or a closed fist. The key is to hit the ball squarely below the center to send it upward and over the net. While reliable, it lacks velocity and is easy for opponents to receive.

2. Overhand Standing Float Serve

The float serve is the most common serve in competitive volleyball. It has no spin, which causes the ball to move unpredictably in the air due to aerodynamic lift and drag. To execute:

  • Stand with the non-dominant foot forward, holding the ball in the tossing hand.
  • Draw the hitting arm back with the elbow high and shoulder open, similar to drawing a bow and arrow.
  • Toss the ball consistently in front of the hitting shoulder.
  • Strike the ball with an open, rigid hand. The contact point must be exactly in the center of the ball.
  • Critical Step: Stop the hand immediately upon impact. Do not follow through. This sudden stop prevents spin and creates the float effect.

3. Jump Float Serve

The jump float serve combines the unpredictable movement of a float serve with a higher contact point. The higher angle allows the ball to travel faster and flatter over the net, reducing the passers' reaction time. The player takes a short, two- or three-step approach, tosses the ball forward, jumps, and contacts the ball at the peak of their jump with the same flat, rigid contact used in a standing float.

4. Jump Spin Serve

The jump spin serve is a high-power weapon. It is executed like a back-row attack. The server stands several feet behind the baseline, tosses the ball high and far forward with topspin, takes a full approach, jumps, and spikes the ball in mid-air. The contact requires snapping the wrist over the top of the ball to create intense topspin, causing the ball to dive quickly. While highly effective, it has a high error rate and requires immense athletic ability.

Tactical Serving Strategies

A smart server does not just hit the ball over the net; they target specific weaknesses in the opponent's line-up. Here are key tactics to apply:

Targeting Weaker Passers

Coaches should monitor the opponent's receive patterns. If a specific hitter is struggling with reception, servers should target them. This pressure can tire the attacker, affecting their offensive performance. Alternatively, targeting a setter who is forced to receive the ball prevents them from running the offense.

Serving the Seams

Seams are the areas between two passers. Serving directly between players causes confusion, as both players might assume the other will pass, leading to a dropped ball (ace) or a double-contact error. The seam between positions 1 and 6, or 5 and 6, are highly effective targets.

Deep and Short Serves

Varying the depth of the serve keeps defenders off-balance. Hitting a deep serve to the back line forces players to run backward. Following it up with a short, dropping serve to the ten-foot line forces the defense to run forward, creating physical fatigue and mental doubt.

With Volley Hub Pro, you can visualize target zones on the court, plan serving rotations, and track individual server statistics. Access coaching tools →
Rules & Technique Open article

The Libero's Playbook

The defensive specialist who runs the backcourt: position rules, serve reception, second-ball setting, reading hitters, and commanding the floor.

What the Libero Is (and Isn't)

The libero is the team's defensive specialist, easily recognized by the contrasting jersey. Introduced in international rules in 1998, the position was designed to improve defense and serve reception without removing the attackers' blocking height. The libero plays the back row and is free to substitute with any back-row player without counting toward the team's regular substitution limit, which is why the role is often described as a "free player" in defensive rotation.

Libero Rules Every Player Should Know

Understanding the restrictions of the position is the difference between a libero who helps the team and one who costs it points. The key rules are:

No Front-Row Actions

The libero can never attack the ball above the height of the net. They may not block or attempt to block, and they may not spike a ball that is completely above the net plane when contacted. The attack can only be executed from the back row and below the net level, which in practice limits the libero to safe rolls and pushes far behind the attack line.

Free Substitutions

Unlike regular players, the libero can be substituted freely between rallies, entering the court for any back-row player. The exchange must happen behind the attack line, in the substitution zone, and only while the ball is out of play. Most teams use the libero to replace the middle blockers, who are typically the weakest passers, as soon as they rotate to the back row.

The Setting Limit

When the libero sets from the front zone using overhead finger techniques, the teammate who attacks the ball is restricted to hitting below the net plane. To enable a normal front-row attack, the libero must either set with a bump technique or set from behind the three-meter line. This rule pushes liberos to master the forearm set from any position on the court.

The Serve Reception Engine

Great teams are built on pass consistency, and the libero is the cornerstone of that system. A libero should take responsibility for the largest, most difficult service zones: the deep seams, the jump serves, and the floating bombs aimed at the boundary lines. This requires reading the server's toss, arm speed, and contact point before the ball even crosses the net. Positioning should favor moving forward rather than backward, because moving forward increases the passing angle and gives the setter a cleaner ball to work with.

Second-Ball Setting

When the first pass is poor and the setter is forced out of the play, the libero becomes the team's emergency setter. Under pressure, the priority is not perfection but accuracy: push the ball to the pins, high enough for the outside hitter to recover the tempo. The most underrated skill in this situation is the decision itself — recognizing early that the setter cannot reach the ball, calling the play with the team, and moving into setting position before panic sets in.

Defense: Reading the Hitter

In defense, the libero's job starts at the opponent's approach. Watching the hitter's eyes, shoulder angle, and the position of the setter's hands gives the first clues about the direction of the attack. Body position must stay low, with the weight on the balls of the feet and the platform ready. The libero plays the deep-center of the court, covering the hard-driven cross-court spikes, while reading whether the hitter is going to swing, tip, or tool the block.

Leadership in the Backcourt

Because the libero sees the entire court from the back row, they are often the defensive captain. A great libero calls out the opponent's formations, announces open hitters, and directs the block's positioning after every serve reception. This communication keeps the team organized in the chaos of long rallies and is the single most visible difference between a good libero and an elite one.

Set up your lineup with a libero and track passing percentages with Volley Hub Pro's lineup and statistics tools. Build your lineup now →
Training & Drills Open article

How to Prepare an Effective Volleyball Practice

Structure, exercises, and practical tips for designing volleyball training sessions that deliver real results.

The Pillars of a Good Practice

An effective volleyball practice is not just a collection of random exercises thrown together. It is a carefully planned project designed to achieve specific goals within a set time frame. Whether you coach a competitive team or a recreational group, the structure of practice follows universal principles that guarantee better results and reduce the risk of injury. In this guide, we will look at how to build a complete training session, from warm-up to cool-down.

The Ideal Session Structure

1. Warm-Up (15-20 minutes)

The warm-up is the most underrated part of practice, yet the most important for injury prevention. It should include: light jogging or jump rope for 3-5 minutes to raise heart rate, joint mobility exercises (shoulders, hips, ankles), dynamic stretching (not static!) such as lunges, high knees, and torso rotations, and finally low-intensity ball drills to activate hand-eye coordination.

2. Technical Phase (20-30 minutes)

This phase focuses on a specific technical aspect. You can split it into two parts: analytical drills in pairs or groups (e.g., setting against the wall, partner bumping, serving accuracy drills) and situational drills that simulate real game scenarios (e.g., reception and attack, block coverage). The key is quality of repetition: 20 correct executions are better than 100 poorly done ones.

3. Tactical Phase (20-30 minutes)

Work on game systems and specific situations that will be encountered in matches. Examples: quick attack with the middle blocker, block coverage system, defense-to-attack transition, side-out drills with percentage targets. Use the Volley Hub Pro formation generator to visualize schemes on the court before executing them.

4. Scrimmage or Competitive Situations (15-20 minutes)

At the end of practice, include a free or semi-structured game phase to apply what has been learned. You can introduce special rules: double points for quick attacks, mandatory serving to a specific zone, mandatory rotation after every point. This keeps motivation high and transfers technical skills to a game context.

5. Cool-Down and Stretching (5-10 minutes)

Never skip the cool-down. It includes light jogging for 2-3 minutes, static stretching holding each position for 20-30 seconds, breathing exercises, and a brief group feedback session on what worked and what to improve. The cool-down aids muscle recovery and reduces next-day soreness.

Specific Drills for Each Fundamental

Serving

Target drill: Place hoops or cones in different court zones (P1, P5, P6) and have players hit specific targets. For jump serves, practice the approach and coordination without the net first, then add the net, and finally the target.

Reception

The "2 vs 1" drill: one player in reception, two teammates alternating serves from different distances and angles. Gradually increase difficulty. For beginners, use tosses instead of serves to focus on bump technique without the pressure of speed.

Setting

Precision drill: setting against a wall with progressively smaller targets. In pairs, alternate setting with direction changes. For setters, practice jump setting and setting after lateral movement.

Attacking

Break down the spike into phases: approach without the ball, approach with a toss hit, attack on a high set, attack on a quick set. Each phase should be automated before moving to the next. Use obstacles or visual cues to train reading the opponent's block.

Blocking

Lateral movement drills along the net touching obstacles. Two-person block against a hitter. Reading block: a coach or teammate decides at the last moment whether to set high or quick, and the blocker must adapt their position.

Recommended Weekly Schedule

For a team training 3 times per week:

  • Monday: Technique (serving and reception) + athletic conditioning
  • Wednesday: Technique (setting and attacking) + game situations
  • Friday: Tactics + scrimmage + video analysis of the previous match

Adapt the schedule based on the match calendar: reduce the load on days leading up to a game and increase technical intensity when there is a break in the schedule.

Common Mistakes to Avoid

  • Dead time: Too many breaks between exercises reduce intensity. Prepare all equipment before the session starts.
  • Too much theory: Long explanations bore players. Show, have them execute, correct on the fly.
  • Ignoring fundamentals: Even experienced players benefit from basic drills. Never take technique for granted.
  • Same structure every time: Variety keeps motivation high. Change exercises, order, and activity formats.
With Volley Hub Pro you can generate custom exercises, visualize formations in 3D, and save your favorite tactical schemes. Explore tools for coaches →
Training & Drills Open article

Warm-Up and Cool-Down Routines

Preparing the body to jump, swing, and dig: activation, dynamic stretching, technical progression, and the recovery routine that prevents injuries.

Why the Warm-Up Matters

Volleyball demands explosive efforts from cold muscles: jumping at full height, swinging at full speed, and diving on the floor. A proper warm-up raises the core temperature, increases blood flow to the muscles, and lubricates the joints, which measurably reduces the risk of muscle strains and ligament sprains. It is also a mental transition: the warm-up is when a player switches from the rest of the day into match mode, sharpening focus before the first whistle.

The Three Phases of a Warm-Up

An effective warm-up follows a logical progression: raise the heart rate, mobilize the joints, then rehearse the exact movements of the sport. Jumping straight into hitting drills without the first two phases is one of the most common causes of shoulder and knee injuries in amateur volleyball.

Phase 1: Activation

The first five to eight minutes are dedicated to light cardiovascular work: jogging around the court, high knees, butt kicks, and short shuttle runs. The goal is a light sweat, not fatigue. Adding a few lateral shuffles and backward runs prepares the ankle and knee joints for the constant directional changes of the game.

Phase 2: Dynamic Stretching

Static stretches (holding a position) belong in the cool-down, not the warm-up. Before play, muscles need dynamic mobility: leg swings forward and sideways, walking lunges with rotation, arm circles progressing to full circles, and torso twists. These movements increase range of motion while keeping the nervous system alert, exactly what a hitter needs for a full arm swing and a deep approach.

Phase 3: Technical Progression

The final phase rehearses game movements at low intensity: pepper and passing pairs, low setting exchanges, then hitting lines with gradually increasing power, and finally a few serving attempts. This progression should finish no more than five minutes before the match starts, so the body stays warm and the first points are played at full readiness.

Match-Day Warm-Up Timing

On match day, the warm-up must be timed carefully. A common mistake is finishing the warm-up too early and spending twenty minutes sitting on the bench, letting the body cool down. The official warm-up period is typically ten minutes of shared court time, followed by a quick captain's meeting. Teams that use the last minute of warm-up for a fast serving and passing sequence enter the first set with sharper timing than teams that finish early.

The Cool-Down: Equal but Opposite

The cool-down is the most skipped part of training, and the most important for long-term health. After the final point, the body is full of metabolic waste and shortened muscle fibers. Five to ten minutes of light jogging brings the heart rate down gradually, while static stretching of the shoulders, hips, quadriceps, hamstrings, and lower back restores muscle length. This is the moment when flexibility gains are actually made, and it dramatically reduces soreness in the following days.

Recovery After the Cool-Down

Hydration starts immediately after the match: water and electrolytes replace what was lost through sweat. A snack with protein and carbohydrates within 45 minutes begins the muscle repair process, and quality sleep completes it. Players who combine a consistent cool-down with proper hydration and sleep recover faster between matches and stay healthier across the entire season.

Plan your practice sessions with warm-up and cool-down blocks built in using Volley Hub Pro's exercise generator and drill library. Generate a practice now →
Event Organization Open article

How to Organize a Volleyball Tournament

From planning to the final bracket: everything you need to know to run a successful volleyball tournament.

Planning Is Everything

Organizing a volleyball tournament requires much more than just gathering teams and blowing a whistle. Good organization makes the difference between a memorable event and an afternoon of chaos. Whether you are organizing a casual tournament among friends, a school event, or a more structured competition, following a clear procedure will help you avoid problems and ensure everything runs smoothly.

Choosing the Tournament Format

The format determines how many matches are played, how long the event lasts, and how the winner is determined. Here are the main options.

Round Robin

Each team plays against every other team. It is the fairest format because the winner is determined by overall results rather than a single elimination. It works well with 4-6 teams. With more teams, the number of matches grows exponentially: 8 teams mean 28 matches, likely too many for a single day.

Single Elimination (Knockout)

Teams are paired up and the loser is eliminated. It is the fastest and most exciting format, but a strong team can be eliminated due to a single bad match. The number of matches equals the number of teams minus one. Ideal when you have many teams and limited time.

Double Elimination

A team is eliminated only after two losses. It combines the fairness of round robin with the efficiency of knockout. It requires more matches than single elimination but gives a second chance to teams that start poorly. Widely used in mid-level amateur volleyball tournaments.

Mixed Format (Group Stage + Elimination)

Teams are divided into groups of 3-4. The top teams from each group advance to a single-elimination bracket. This is the most common format for tournaments with 8-16 teams because it guarantees a minimum number of matches for everyone while keeping the competitive edge in the final phase.

Tip: For a one-day amateur tournament with 8 teams, the mixed format with 2 groups of 4 is almost always the best choice. Each team plays at least 3 matches and the final takes place in the late afternoon.

Rules and Match Duration

Establish the tournament rules in advance and communicate them to all participants before the start. Here are the aspects to define:

  • Sets and scoring: Best of 3 sets (2 out of 3) or best of 5 (3 out of 5)? Sets to 21 or 25 points? Mandatory 2-point advantage or cap at 30?
  • Time limit: In tournaments with many participants, impose a maximum time for each match (e.g., 45 minutes). The team ahead when time runs out wins.
  • Substitutions and timeouts: How many substitutions are allowed? How many timeouts per set? In amateur volleyball, more flexible rules are often adopted.
  • Refereeing: Who referees? If there are no official referees, decide whether players will call their own faults or if there will be an external referee per match.

Practical Tournament Management

Courts and Equipment

For a tournament with simultaneous matches, you need at least 2 courts. Each court must have: a regulation net, game balls (at least 2 per court), a score sheet, and benches for the teams. If playing outdoors, consider weather conditions and lighting.

Scheduling

Create a match schedule with precise times. Each match should have a start time and an estimated duration. Include a 5-10 minute buffer between matches for any delays. Communicate the schedule at least a week before the event and remind everyone on the morning of the tournament.

Bracket and Scores

Use a visible bracket (physical or digital) to keep track of results. Tools like Volley Hub Pro offer interactive brackets that update automatically as you enter results. You can also project the bracket on a screen to make it visible to all participants.

Event Day Logistics

On the day of the tournament, arrive at least an hour early to set up the courts. Hold an initial briefing with all captains to review the rules. Track results in real time and promptly communicate any schedule changes. Prepare water and first aid supplies. At the end, organize an awards ceremony, even if symbolic: participants appreciate the recognition.

With Volley Hub Pro you can create your tournament bracket in seconds, manage group stages and knockout rounds, and update results in real time. Create your bracket →
Data Analysis Open article

Useful Statistics for Coaches and Players

Essential metrics for analyzing performance, preparing matches, and helping your athletes grow.

Why Statistics Matter

In modern volleyball, data is not just numbers: it is a decision-making tool that allows coaches and players to understand what works and what needs improvement. A good statistics system turns subjective feelings into objective evidence. You do not need to be a professional analyst to benefit from game metrics: even a simple sheet of paper with the right data can make the difference between a team that improves and one that stagnates.

Fundamental Metrics for Every Player

Kill Percentage (K%)

The percentage of attacks that result in winning points. It is calculated by dividing the number of kills by total attack attempts. A good professional attacker averages around 45-55%. For amateurs, a K% above 30% is considered positive. This metric is particularly useful for evaluating outside hitters and opposites.

Efficiency Rating (EFF)

The most comprehensive metric for evaluating attack performance. Formula: (Kills - Errors) / Total Attempts. Unlike K%, it penalizes errors. A player who attacks a lot but makes many mistakes will have a decent K% but a low EFF. For coaches, EFF is often more meaningful than K% because it rewards consistency.

Passing Grade (Reception)

The quality of reception is rated on a scale (typically 0-3 or 0-4). A score of 3 means perfect reception that gives the setter all attack options. A score of 0 means a direct error (ace received). The average of a player's reception scores during a match gives an immediate measure of their reliability in serve receive.

Blocks per Set (BPS)

The average number of blocking points per set. This counts not only stuff blocks but also touches that allow defensive transition. A good middle blocker achieves 0.8-1.2 blocks per set. Numbers are lower for outside hitters (0.3-0.6) because they start farther from the center of the net.

Digs per Set (DPS)

Defensive plays (digs) per set. This is the primary metric for evaluating defenders and the libero. A good libero collects 2.5-4 digs per set. This statistic should always be evaluated together with defensive quality: a defender who touches many balls but does not direct them toward the setter is less effective.

Team Statistics

Side-Out Percentage

The percentage of rallies where the receiving team wins the point. A strong team has a side-out above 60%. The higher the side-out percentage, the less pressure the team faces on break point. It is the most important statistic for evaluating overall team efficiency.

Break Point Percentage

The percentage of rallies where the serving team wins the point. Typical values range between 25% and 40%. A team with a high break point percentage is lethal because it puts constant pressure on opponents. Serving is the main factor influencing this metric.

Serve Aces per Set

The number of serving aces per set. An average of 1.5-2.5 aces per set is considered good for mid-level teams. More important than the absolute number is the ace-to-error ratio: a powerful serve with many errors can be counterproductive.

How to Use Data in Training

Statistics are useless if they are not translated into concrete actions. Here is how to use them effectively:

  • Identify weak points: If a player has a low passing grade, dedicate more time to reception in their specific training.
  • Prepare for matches: Analyze opponent statistics. If their opposite hitter has a very high K%, prepare a specific double block.
  • Motivate players: Objective numbers help players understand where they need to improve without feeling personally attacked.
  • Track progress: Compare statistics month after month to see if training is producing results.

Digital Tools for Tracking

Today there are numerous apps and platforms for tracking statistics in real time. Volley Hub Pro includes a player evaluation module that tracks attack, serve, block, setting, and defense on a visual star scale. Data can be exported and shared with the coaching staff. For professional monitoring, systems like DataVolley exist, but for most amateur coaches, a good spreadsheet or an integrated tool is more than sufficient.

Volley Hub Pro includes a 5-dimension evaluation system for each player, with a radar chart visualization of abilities. Track attack, serve, block, setting, and defense in a simple and intuitive way. Start evaluating your players →
Health & Conditioning Open article

Injury Prevention & Conditioning

Building athletic durability in volleyball: landing biomechanics, shoulder care, ankle stability, and training design.

The Physical Demands of Volleyball

Volleyball is a sport characterized by explosive movements. Players jump, land, slide, and rotate at high speeds, putting immense stress on their joints, tendons, and muscles. A single player can jump over 100 times during a competitive five-set match. This high volume of explosive work makes players susceptible to overuse injuries, particularly in the knees, shoulders, and lower back. To stay on the court and perform at a high level, players must commit to structured conditioning and injury prevention protocols.

Common Injuries and How to Prevent Them

Understanding which areas of the body are most vulnerable is the first step in designing an effective prevention routine. The three most common injuries in volleyball are:

1. Patellar Tendonitis (Jumper's Knee)

Jumper's knee is an overuse injury of the patellar tendon, which connects the kneecap to the shinbone. The constant impact of jumping and landing on hard indoor courts causes micro-tears in the tendon. To prevent jumper's knee, players must focus on landing biomechanics. Always land with bent knees to absorb the shock, rolling from the toes to the heels. Strengthening the quadriceps, hamstrings, and gluteal muscles helps stabilize the knee joint, reducing the load placed directly on the tendon.

2. Ankle Sprains

Ankle sprains usually occur at the net when a player lands on a teammate's or opponent's foot after blocking or attacking. To reduce the risk of sprains, players should perform balance and proprioception drills. Using balance boards, single-leg squats, and lateral agility drills improves the nervous system's ability to stabilize the ankle during sudden movements. Additionally, wearing supportive ankle braces or high-quality volleyball shoes with wide outriggers provides external support.

3. Rotator Cuff Tendonitis

The overhead serving and spiking motions place intense stress on the shoulder joint, specifically the rotator cuff muscles that stabilize the shoulder socket. Repetitive swinging can lead to inflammation and tears. Prevention requires strengthening the rotator cuff using resistance band exercises (internal and external rotations) and stretching the posterior shoulder capsule. Ensuring proper hitting mechanics—drawing the elbow back with the shoulder open rather than dropped—reduces strain on the joint.

Strength Training for Power and Stability

Volleyball players do not need excessive muscle bulk, but they do need explosive power and structural stability. A volleyball strength program should focus on three areas:

Lower Body Power

Exercises like squats, deadlifts, and lunges build the foundation of leg strength. Once a strength base is established, players should transition to plyometrics—box jumps, depth jumps, and bounding. Plyometric training improves the stretch-shortening cycle of the muscles, allowing players to jump higher and react faster on the court.

Core Stability

A strong core is the link that transfers force from the legs to the upper body during a spike. Exercises like planks, Russian twists, and medicine ball throws build rotational stability, protecting the lower back from the twisting forces involved in overhead hits.

Shoulder Mobility

Mobility is just as important as strength. Inflexible shoulders limit the range of motion during a swing, forcing other muscles to overcompensate. Regular stretching of the chest, lats, and shoulders maintains healthy joints, permitting a full, clean arm swing.

Agility and Conditioning on the Court

Volleyball is a sport of short, high-intensity sprints. Traditional long-distance running is not effective for volleyball conditioning. Instead, players should use interval training that mimics match rallies. Shuttle runs, suicide drills, and lateral block-movement exercises build the anaerobic capacity needed to survive long, exhausting rallies without losing coordination.

Recovery and Hydration Protocols

Muscles do not grow or heal during training; they heal during recovery. Players should never skip post-practice stretching, which helps restore muscle length and reduce soreness. Getting 8-9 hours of sleep is critical for cellular repair. Finally, proper hydration and nutrition—consuming protein and carbohydrates within 45 minutes of a workout—replenishes glycogen stores and speeds up muscle fiber repair, keeping the body ready for the next match.

Using Volley Hub Pro, you can track physical workloads, log exercise routines, and keep your roster balanced to prevent player fatigue. Monitor your roster now →
Health & Conditioning Open article

Mental Toughness in Volleyball

The game within the game: pre-point routines, focus under pressure, recovering from errors, and building a team culture that wins close sets.

The Mental Game of Volleyball

Volleyball is a sport of momentum swings and sudden pressure. A single error hands the serve to the opponent, and a three-point run can change the entire mood of a set. Because the ball is in play for only a few seconds at a time, the mental game happens mostly between points—in the ten seconds of quiet where players choose how to react. Teams that win close matches are rarely the most talented; they are the ones that stay composed, communicate, and reset faster after every rally.

Pre-Point Routines: The Reset Button

Between points, elite players perform a short, repeatable routine that pulls their attention back to the present. A common sequence: take one slow breath, physically reset the hands, and say one internal cue word such as "next" or "side-out." The routine acts as a trigger that ends the previous point—whether it was a great kill or a terrible error—and starts the next one with a clean mind. Every player should develop a personal reset and use it after every single rally, not only after mistakes.

Breathing as a Performance Tool

Under pressure, the body tightens: breathing becomes shallow, heart rate rises, and muscles lose their smoothness. Controlled breathing—long exhales before the serve or while receiving—activates the parasympathetic nervous system and slows everything down. The extra half-second of calm it provides is often the difference between a clean platform pass and a shanked one in the decisive points of a set.

Handling Errors Without a Downward Spiral

The most dangerous moment in volleyball is the one immediately after a mistake. A missed serve, a netted attack, or a broken pass triggers frustration, and frustration invites the next error—usually a harder, less controlled swing. The reset routine is the antidote, but it needs team support. The teammate who passes the ball to the server, the captain who claps after an error, and the coach who never punishes mistakes with tension all protect the team from entering the spiral. Errors are information, not judgments: every miss has a technical cause that can be fixed on the next rally.

Performing in Pressure Situations

Set point, match point, and serve for the fifth set: these moments separate teams. Preparation for pressure is built in practice by simulating it: running sets with scoreboards at 23-23, practicing side-out situations at match point, and serving with consequences in drills. Players who have rehearsed the moment repeatedly stop being surprised by it. During the match itself, pressure is managed by narrowing the focus: never think about the score, only about the next action—this serve, this pass, this swing.

Building a Resilient Team Culture

Mental toughness is a team trait. It grows in an environment where communication is constant, mistakes are owned and forgiven, and every point is treated with the same intensity. Teams should establish explicit rules: no silent rotations, no arguing over errors, and one leader—usually the setter or libero—who controls the tempo between rallies. When the culture is right, a team that is down 20-24 stops believing it has lost and starts seeing the sequence of actions needed to win three straight points.

Build your team's routines into every practice and match with Volley Hub Pro's planning and scorekeeping tools. Get your team organized →
Rules & Technique Open article

Volleyball Rules and Refereeing

Understanding the rulebook makes you a better player and a fairer referee: scoring, rotation faults, ball handling, net faults, and official signals.

Rule edition and competition: This guide refers to the FIVB 2025–2028 rulebook. Selected 2026 competitions trial different reception timing and substitution limits; see the FIVB trial announcement and confirm your organizer's rules. Updated October 9, 2026.

The Scoring System: Rally Points and Sets

Modern volleyball is played under the rally point system: a point is awarded on every rally, regardless of which team served. A match is decided by winning three out of five sets, with each set played to 25 points and a minimum two-point margin. If the match reaches a fifth set, it is played to 15 points, still with a two-point lead required. The rally point system removed the old side-out format, making every play count and turning serve reception into one of the most important skills in the game.

Rotation and Positional Faults

A positional fault concerns alignment; a rotational fault concerns service order. The base 2025–2028 rulebook checks receiving positions at service contact and allows serving players free positioning. Check any competition-specific variation.

Ball Handling Rules

Ball handling is judged on four principles: contact, push, throw, and palm. The ball must be hit cleanly, never caught, held, or thrown. During a set, both hands must contact the ball simultaneously, and the touch must be brief. During a reception of the serve or an attack, the ball may be touched with any part of the body, including the feet. The referee judges the quality of the touch based on the technique used, which is why a clean platform pass on the serve receive is almost never called a fault, while a "cradle" set with a visible pause almost always is.

Double Contact and Four Hits

A double contact occurs when a player touches the ball twice in a row, or when the ball contacts different parts of the body successively during a single touch. A team may contact the ball a maximum of three times before sending it over the net; the fourth contact is an automatic fault. The block does not count toward the three allowed touches, which is why a touch block followed by a dig, set, and attack is perfectly legal.

Net Faults and Over the Net

Touching the net is a fault, with three important exceptions: the touch must happen during a playing action, and incidental contact caused by a ball driven into the net is not penalized. Blockers may reach over the net after the attacker has contacted the ball, and a back-row player performing an attack jump from behind the three-meter line may reach over the net legally. The classic "line fault" applies to serves: the server must not step on or beyond the end line during the toss and contact.

The Referee Team and Official Signals

A full officiating crew consists of the first referee (on the stand), the second referee (on the court), a scorer, and four line judges. The first referee is the final authority on the match, deciding ball handling and net faults. The second referee supervises rotations, timeouts, and substitutions. The line judges signal with flags: in for in, out for out, and a combined signal when the ball lands near a line. Every player should recognize the basic hand signals—point, rotation fault, double contact, net touch, and four hits—to understand immediately why a whistle was blown.

Timeouts and Substitutions

The base FIVB rulebook allows two requested timeouts and six substitutions per set; requested timeouts last 30 seconds. Automatic breaks at 8 and 16 points are not a universal requirement. Competition regulations can vary.

Run your matches with clean refereeing and track rotations and substitutions with Volley Hub Pro's match tools. Run a match now →

Frequently Asked Questions (FAQ)

Authoritative technical answers to common questions about volleyball rules, team balancing math, and tactical tool features.

How does the skill rating affect team distribution?

Each athlete in your roster has an overall rating from 1 to 5 stars, including decimals (e.g., 3.4 or 4.2). When you click "Generate Teams", Volley Hub Pro compares up to 100 candidate splits and can stop early if it finds equal average ratings.

During each iteration, the algorithm calculates the combined cumulative skill weight (twA and twB) for both potential squads. It measures the absolute difference (bestDiff) between team averages. The iteration that achieves the tightest parity is retained. For an even player pool, the team counts match; for an odd pool, they differ by one. The generator does not guarantee a particular role distribution or the globally best split.

What is the difference between a 5-1 and 4-2 rotation system?

The core difference lies in the number of designated setters and offensive attack options across the six rotations:

5-1 System (1 Setter, 5 Attackers): A single setter runs the offense across all six rotations. When the setter rotates into the front row (Zones 4, 3, 2), the team operates with two front-row attackers and can utilize back-row pipe attacks. When the setter rotates into the back row (Zones 1, 6, 5), there are three front-row hitters. On reception, the setter moves toward the setting position after meeting the positional requirements used by the competition. This is the dominant system in competitive volleyball.

4-2 System (2 Setters, 4 Attackers): Two setters are positioned opposite each other on the court. Whichever setter is currently in the front row sets the ball, while the back-row setter focuses on defense. This ensures two front-row attackers in every rotation without requiring back-row penetration, making it ideal for physical education classes, beginner teams, and recreational leagues.

Does the tool validate legal rotations?

The court helps explain rotation order and tactical movement. It does not certify a legal lineup or replace an official. Use the rotation guide for rule references, and check the organizer's current rules before teaching reception positions.

Can I export or share generated team rosters?

Yes. Volley Hub Pro supports several high-fidelity export formats. You can generate a branded, high-resolution PNG lineup card containing starting rosters, bench allocations, team skill weights, and court assignments suitable for printing or posting to team social channels.

Additionally, you can copy structured text summaries directly to your clipboard for WhatsApp, Telegram, or email distribution to players, or export data into tournament brackets. If you log into your free account, your custom player lists and saved teams are synced securely to the cloud.

Is Volley Hub Pro accessible offline for gymnasiums with poor connectivity?

The Android package includes local app assets. In a browser, pages already loaded may keep working during a connection loss, but a full offline reload depends on available cached assets. Cloud synchronization, sign-in and Coach AI require a connection. Export important work and check the exact device before relying on it during an event.

How does the algorithm handle specialized roles like Setters and Liberos?

The generator compares overall ratings and balances player counts. Role tags are displayed for planning, but they are not constraints in the automatic split. Check that each team has the roles required for your drill, then drag players between teams if needed. The worked tutorial above includes a manually checked example.

TEAM A
Average: 0.00 | Total: 0.0
VERSUS
TEAM B
Average: 0.00 | Total: 0.0
GENERATED WITH VOLLEY HUB SQUAD GEN 3D PRO
Message
Coach

Match Stats

TEAM A
TEAM B
Substitutions
0
Substitutions
0
Timeouts
0
Timeouts
0